
If you have purchased a box with the inner cardboards included, you can access the assembly instructions for the inner cardboards from here.
Receiving a RetroBoxes case is more than just opening a package — it’s the first step in protecting, preserving and showcasing a valuable collector’s item.
We know that assembling a storage box can seem uncertain at first, especially if it’s your first time working with a flat corrugated cardboard template. That’s why we’ve created this clear, detailed and easy-to-follow guide, ensuring a perfect result from your very first attempt. Don’t worry — the process is quick and effortless.
This article is designed for retro video game console collectors and anyone looking for a safe, professional and durable storage solution for their consoles, with careful attention to every detail.
Table of Contents
How to Assemble a RetroBoxes Case: What Exactly You Receive in Your Order
If you’re looking for a reliable online store to buy a premium reproduction box for your retro or vintage video game console, RetroBoxes.es is the perfect choice.
Each order is carefully prepared to ensure maximum protection and an exceptional unboxing experience. Here’s exactly what you receive:
• For home console boxes, you’ll receive a flat, rectangular sheet of high-quality corrugated cardboard, packaged with museum-level care — secure for shipping and designed to arrive in flawless condition. For handheld console boxes, your order arrives in a sturdy, conventional cardboard box, equally well protected.
• Single-wall corrugated cardboard (1.4 mm thick), combining durability, strength and light weight — ideal for long-term storage and display.
• The box template printed directly onto the cardboard, allowing for fast, precise and hassle-free assembly.
Before you begin assembling, take a moment to examine the template carefully — every detail matters.
► Remember: it’s always better to check twice than to make a single costly mistake.
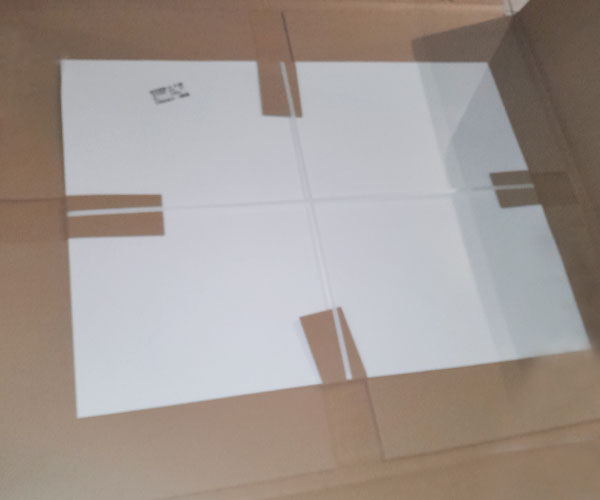
Step 1: Carefully Examine the Sheet Before Making Any Cuts
This is one of the most important steps and, very often, the most underestimated.
Place the sheet on a flat, well-lit surface and pay attention to the following:
• The printed area, where the box template is located
• The unprinted area, which does not form part of the box
► Key tip: do not cut anything yet. Take time to familiarise yourself with the design first. This small step helps prevent irreversible mistakes.
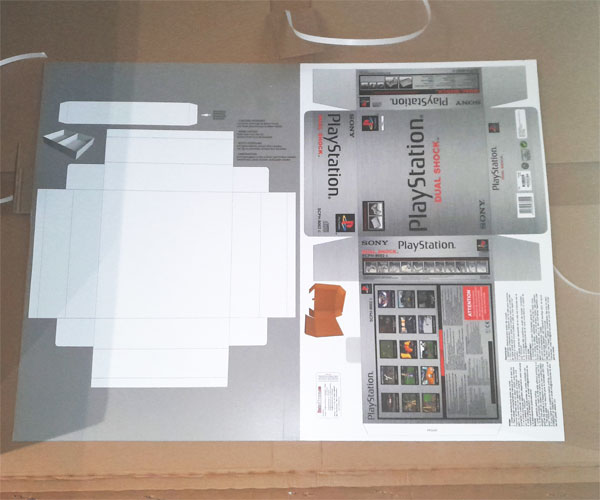
Step 2: Remove the Excess Cardboard That Is Not Part of the Template
Once you have identified the template, you can proceed with the first actual cut.
How to do this correctly:
• Use a sharp craft knife or blade; scissors should be used only for curved sections
• Work slowly, applying steady and controlled pressure
• Remove only the unprinted cardboard
The objective is to retain only the exact box template.
► Important: using a dull craft knife may tear the cardboard and damage the edges, compromising the final result.”
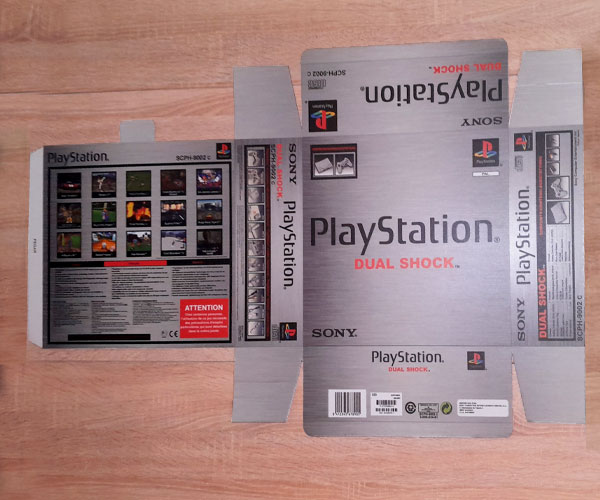
Step 3: Identify All the Lines and Elements of the Box
With the template fully prepared, carefully inspect the fine lines printed on the cardboard.
These lines clearly define:
- The six faces of the box
- The flaps
- The locking tab
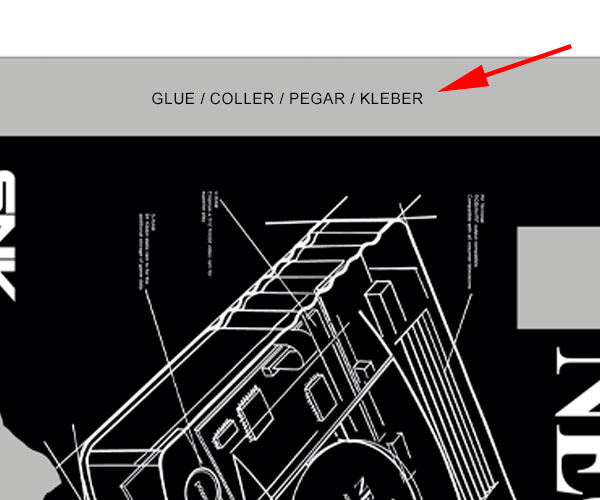
- The single adhesive area
In some templates, each face of the box is printed in a different colour from the adjacent one. However, in templates where the distinction between box faces is not immediately clear, subtle guide lines are added. These lines are intentionally discreet so that, once assembled, the box achieves a clean, professional finish. It is essential to pay close attention to these guide lines, as their subtlety can make them easy to overlook.
Step 4: Scoring the Fold Lines (the Step That Raises the Most Questions)
This is the stage that many customers find the most demanding, and it is also the most critical for achieving a flawless final result.
At this point, it is important to understand that the process involves scoring, not cutting.
The fold lines must be lightly scored from the unprinted side of the cardboard.
How should this be carried out?
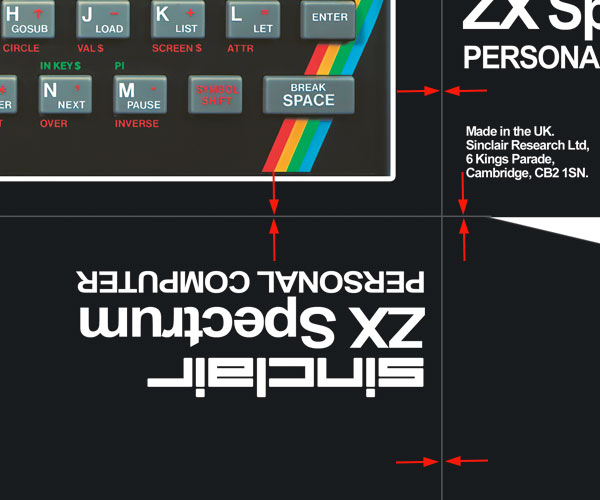
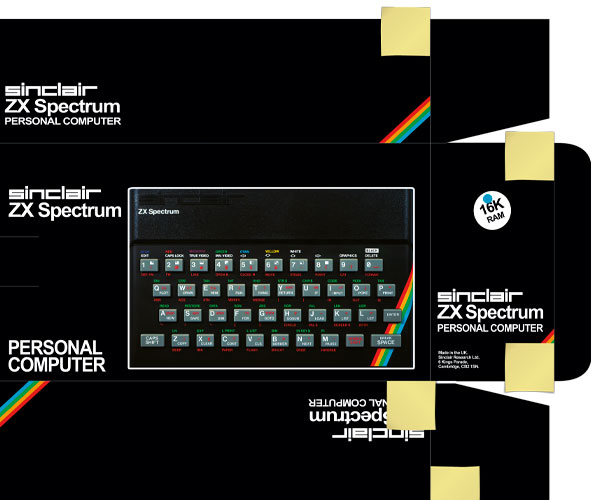
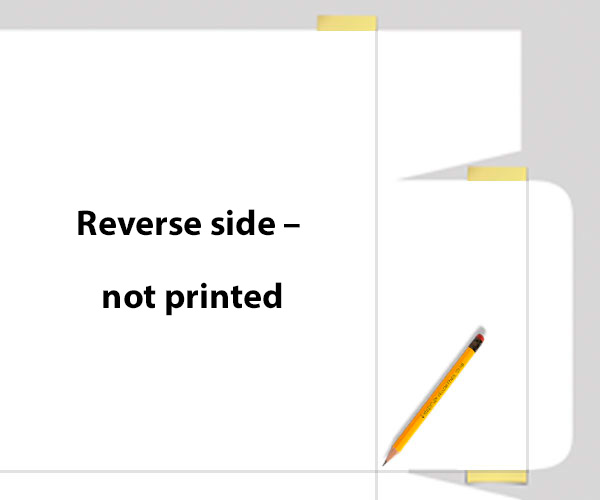
Once the fold lines have been identified, mark them on the printed side using a clip or, preferably, a Post-it note. This allows you to apply firm, controlled pressure when scoring from the unprinted side. We recommend Post-it notes because they can be removed without causing any damage to the printed surface.
Place two Post-it notes so that they form an imaginary straight line. Using a ruler, connect them with a pencil to create a clearly defined guide line. Repeat this process carefully for each fold line in turn.
Take time to study the following two images closely before proceeding
This is the stage that many customers find the most complex, and it is also the most important for achieving an excellent final result.
At this point, it is essential to understand that this is not about cutting, but about scoring.
The fold lines should be lightly scored from the unprinted side of the cardboard.
How should this be done?
Once the fold lines have been identified, mark them on the printed side using a clip or, preferably, a Post-it note. This will allow you to score firmly from the unprinted side. We recommend using Post-it notes because they can be removed afterwards without damaging the print.
Once you have placed two Post-it notes to form an imaginary line, take a ruler and connect them with a pencil to create a clearly marked guide line. Repeat this process carefully, one line at a time.
Carefully observe the two images before proceeding.
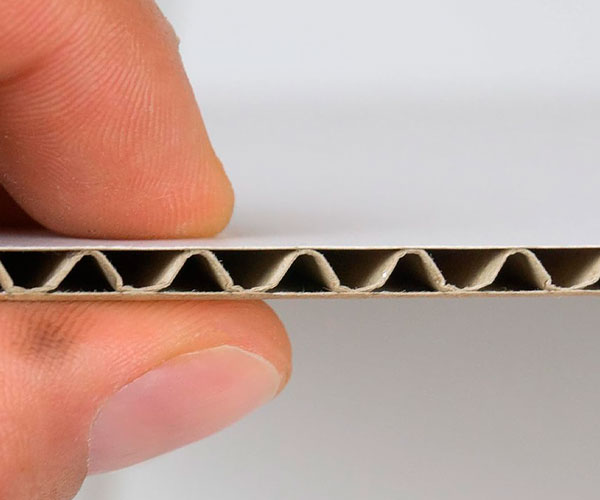
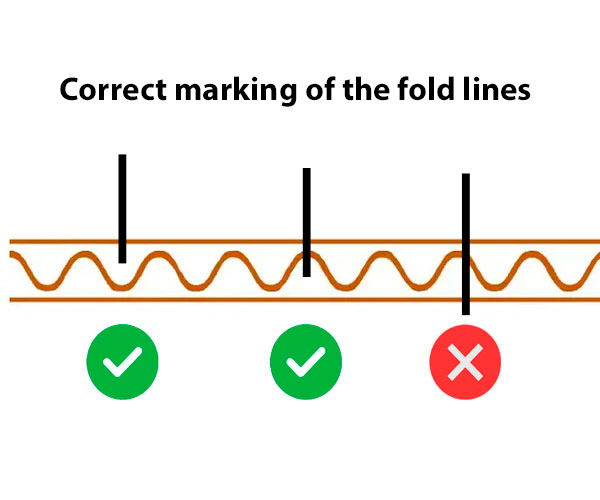
► If the scoring is done correctly:
- The folds will be straight
- The sides will fit together perfectly
- The final finish will look far more professional
► Tip: Use a Post-it note on the lines in the printed area to help score the fold lines accurately on the unprinted reverse side.
Step 5: Fold Each Section Precisely Along the Scored Lines
Once all the lines have been scored, folding becomes straightforward.
Fold:
- The sides of the box
- All the flaps
- The closing tab
- The adhesive area
Take your time and use the scored lines as your guide.
► Collector’s tip:
A well-executed fold is what makes the difference between a ‘good’ box and a perfect display-quality box.
Box Folding Video – Front View
Box Folding Video – Rear View
Step 6: Apply Glue Only to the Indicated Area
The template is designed to require only a single gluing area, which is clearly indicated on the template, as you can see in the image…
Recommendations:
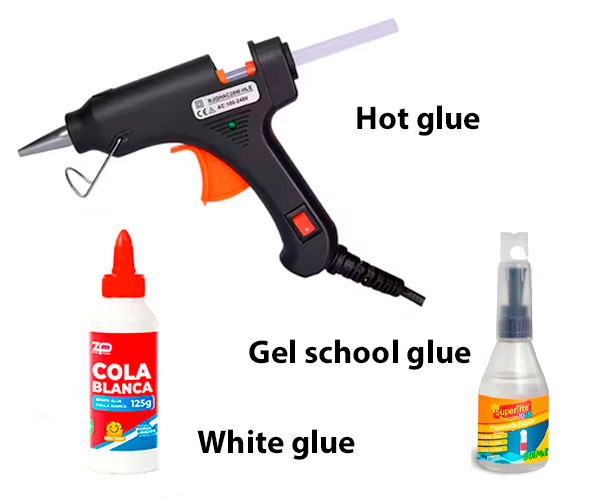
- Use gel school glue (it dries more quickly) or white PVA glue (it dries very slowly), although hot-melt glue is the fastest option, as it sets almost immediately once it cools.
- Apply a moderate amount
- Press for a few seconds until it bonds securely
There is no need to reinforce any other areas: the design already guarantees structural strength.”
Paso 6: Aplica pegamento únicamente en la zona indicada
If you have followed all the steps:
- The box will be perfectly aligned
- It will have a clean, solid finish
- It will protect your console or video game for years to come
This is the same process used by many collectors for storage, display and long-term preservation.

Common Assembly Mistakes to Avoid
- Cutting without first examining the template
- Failing to score the fold lines properly
- Cutting instead of scoring
- Folding without scoring beforehand
- Using too much glue
Avoiding these mistakes will save you time and materials.
Designed for collectors, built to last
At RetroBoxes, we understand that it’s not just about storing a video game console, but about preserving a piece of history.
That’s why our boxes are designed for those who value detail, precision and the careful protection of their original console.
Preserve your collection the right way
Choose RetroBoxes and give your retro console the protection and presentation it deserves.
Our reproduction boxes are designed with collectors in mind — combining precision, durability and a professional finish that enhances both storage and display.
If you value authenticity, attention to detail and long-term preservation, RetroBoxes is the standard your collection deserves.